

Welcome to your ultimate guide for creating a crowd-pleasing snack that’s bursting with flavor. Whether you’re hosting a game night or need a quick party dish, these bite-sized delights are sure to impress. They blend zesty spices, creamy fillings, and a soft tortilla base for a taste that’s both familiar and exciting.
This post breaks down the process into simple, foolproof steps. You’ll learn how to layer ingredients evenly, roll the tortillas tightly, and slice them into perfect spirals. No special skills are required—just a few fresh components and a love for bold Tex-Mex-inspired combinations.
Prefer a little heat? Add jalapeños. Want to keep it mild? Swap in avocado crema. The recipe adapts to your preferences, making it ideal for picky eaters or dietary needs. Serve them chilled or slightly warmed, paired with your favorite dipping sauce.
Key Takeaways
- Ideal for parties, potlucks, or quick snacks
- Simple prep with minimal kitchen tools
- Customizable fillings to match your taste
- Easy-to-follow rolling and slicing tips
- Make-ahead friendly for stress-free hosting
Overview of Taco Pinwheels Recipe
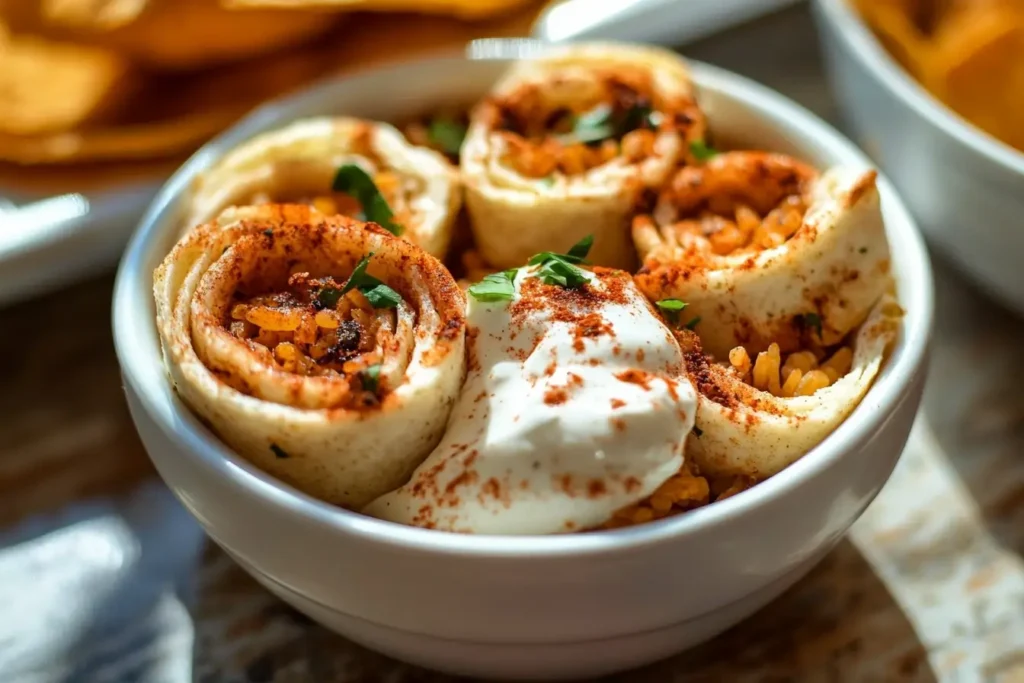
Uncover the secrets behind this beloved finger food’s popularity. These bite-sized swirls combine creamy textures with zesty spices, creating a snack that disappears faster than you can refill the platter. Their versatility makes them ideal for casual gatherings or elevated events—no oven required.

The Appetizer Appeal
At the heart of these crowd-pleasers lies a rich blend of softened cream cheese and sharp cheddar. Combined with salsa and homemade taco seasoning, the filling strikes a balance between tangy and savory. Spread evenly on tortillas, it holds ingredients together while adding luxurious mouthfeel.
“The magic happens when cool creaminess meets bold spices,” notes a Texas-based caterer. “They’re always the first appetizer to vanish.”
A Quick Look at This Tex-Mex Favorite
Prep takes under 15 minutes, with most ingredients already in your pantry. Customize the mix-ins: black beans for fiber, diced tomatoes for freshness, or green chiles for heat. The make-ahead nature means you can assemble them hours before guests arrive.
| Feature | Benefit | Flexibility |
|---|---|---|
| Cream cheese base | Ensures smooth spreadability | Swap with Greek yogurt |
| Taco seasoning | Adds authentic Southwest flavor | Adjust spice intensity |
| Chill time | Firms up for clean slicing | 30 mins to overnight |
Serve them cold for a refreshing bite or briefly warm them to intensify the aromas. Either way, they’ll earn compliments without keeping you tied to the kitchen.
Ingredients and Customization Options
The foundation of any great appetizer lies in its components. Start with cream cheese as the binding agent—its smooth texture ensures even spreading. You’ll need 1 cup of shredded cheddar, ½ cup of sour cream, and 2 tablespoons of taco seasoning for that signature kick.
Essential Pantry Items
Most ingredients are kitchen staples. Flour tortillas work best for rolling, but corn versions add crunch. Keep your seasoning blend simple: chili powder, cumin, and garlic powder create depth without overpowering. A dash of lime juice brightens the filling.
Substitutions and Enhancements
Swap sour cream with Greek yogurt for tangy richness. Gluten-free wraps or spinach tortillas add color and dietary flexibility. For heat lovers, mix in minced jalapeños or smoked paprika. “Customization is key,” says Chef Maria Gomez. “These adapt to any pantry—just maintain the creamy base.”
| Ingredient | Swap | Benefit |
|---|---|---|
| Sour cream | Greek yogurt | Higher protein |
| Flour tortillas | Spinach wraps | Vibrant color |
| Store-bought seasoning | Homemade blend | Control salt & spice |
Prep time shrinks when you measure shredded cheese ahead. Store fillings separately if making them a day early—assemble just before serving for freshness. This approach lets you experiment with other recipes’ elements while keeping textures intact.
Creating the Perfect Filling
The secret to irresistible swirls lies in the filling’s balance of flavors and textures. A smooth, spreadable base ensures every bite holds together while delivering bold Southwest-inspired notes. Let’s break down how to layer ingredients for maximum impact.
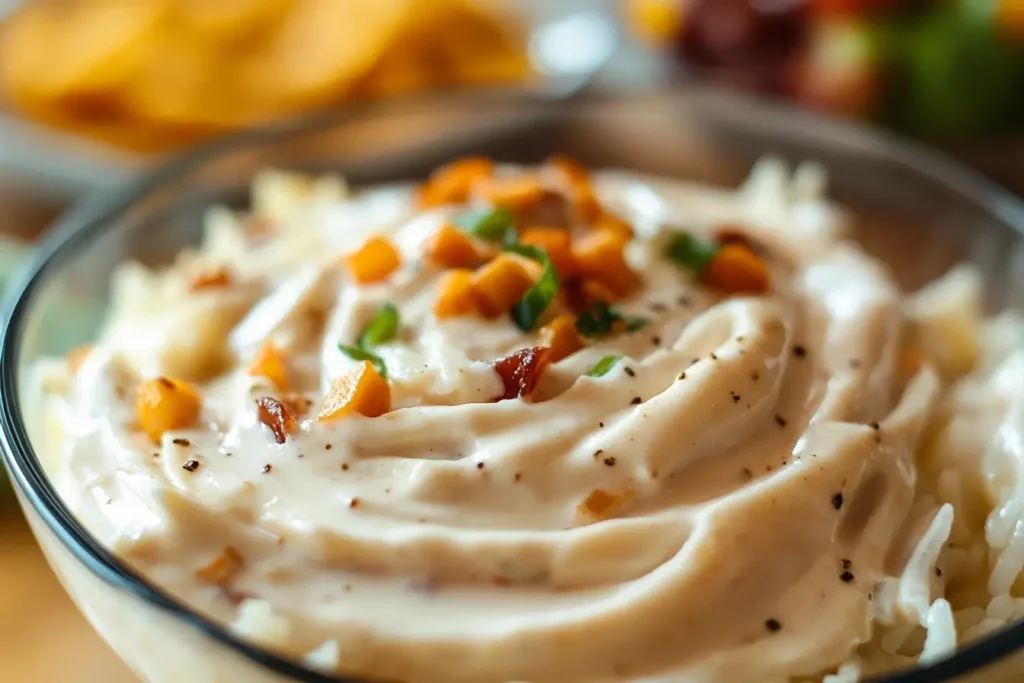
Mixing the Cream Cheese Base
Start with softened cream cheese at room temperature. This prevents lumps and allows easy blending with other components. Combine 8 oz of cream cheese with ¼ cup sour cream using a hand mixer or spatula. The mixture should glide across tortillas without tearing them.
Blending Taco Seasoning and Flavors
Add 2 tablespoons of homemade taco seasoning for depth—or adjust store-bought blends to reduce sodium. Fold in diced green onions, sliced black olives, or pickled jalapeños for crunch and tang. “Let the filling rest 10 minutes before spreading,” suggests culinary expert Lisa Tran. “This lets spices hydrate evenly.”
| Ingredient | Purpose | Pro Tip |
|---|---|---|
| Cream cheese | Binding agent | Microwave 10 seconds if too firm |
| Sour cream | Moisture control | Use full-fat for richer texture |
| Seasoning | Flavor foundation | Toast spices first for intensity |
Prep the mixture ahead time—store it covered for up to 24 hours. Chilling firms the filling, making rolling easier. For extra flair, stir in lime zest or cilantro just before assembling.
Step-by-Step Assembly Instructions
Ready to transform simple ingredients into eye-catching bites? Follow this blueprint for creating uniform spirals that hold their shape. Proper technique ensures every slice delivers the perfect filling-to-tortilla ratio.
Rolling and Chilling Techniques
Lay a flour tortilla flat on a cutting board. Spread the cream cheese mixture evenly, leaving a ½-inch border. This prevents overflow when rolling. Add extras like diced olives or peppers in a thin layer.
Roll the tortilla tightly away from you, applying gentle pressure. Wrap in plastic and refrigerate for 60 minutes. Chilling firms the filling, making slicing cleaner. “Never skip the chill time,” advises caterer Devon Cole. “It’s what keeps those swirls photogenic.”
| Step | Tool | Pro Tip |
|---|---|---|
| Spreading | Offset spatula | Work from center outward |
| Rolling | Parchment paper | Use as a guide for tightness |
| Chilling | Plastic wrap | Label rolls with flavors |
Slicing for a Stunning Presentation
Use a sharp knife to cut chilled rolls into ½-inch pieces. Wipe the blade between slices for clean edges. Arrange pinwheels spiral-side up on a platter lined with lettuce or herbs.
- Rotate the roll 90° after each cut for even thickness
- Discard uneven end pieces for consistency
- Serve immediately or cover with damp paper towels
These steps let you make taco pinwheels that wow guests visually and texturally. The effort pays off when your appetizer table becomes the party’s focal point.
Make-Ahead and Storage Strategies
Hosting a gathering doesn’t have to mean last-minute chaos. These savory bites shine when prepped in advance, letting you focus on guests instead of kitchen prep. Follow these simple steps to keep your appetizer fresh and flavorful from assembly to serving.
Preparation Tips for Busy Days
Assemble rolls up to 24 hours before your event. Wrap each tightly in plastic, then place them in an airtight container lined with parchment paper. This prevents sogginess while locking in moisture. For best results, slice just before serving to maintain crisp edges.
“Chilling overnight actually improves flavor distribution,” says event planner Carla Simmons. “The spices meld beautifully with the creamy base.”
If storing pre-sliced pieces, layer them between wax paper in your container. Add a damp paper towel on top to prevent drying. Avoid overcrowding—this keeps the flavors vibrant and textures intact.
| Timeline | Storage Method | Quality Tip |
|---|---|---|
| 6-8 hours ahead | Whole rolls in fridge | Slice cold for clean cuts |
| 24 hours ahead | Unaltered filling in bowl | Stir before spreading |
| Post-event | Leftovers in freezer bag | Consume within 1 month |
Short on time? Use a packet taco seasoning instead of homemade blends. For meat lovers, add cooked ground beef or turkey during assembly—just ensure it’s cooled completely first. Refresh chilled pinwheels by letting them sit at room temperature for 10 minutes before plating with fresh salsa.
Delicious Variations and Protein Additions
Transform your appetizer spread into a customizable feast with endless flavor combinations. Whether you’re feeding meat lovers or plant-based guests, these twists keep your platter exciting. Let’s explore how simple swaps can elevate this classic dish for any occasion.
Vegetarian and Meat Options
Swap the traditional filling with shredded chicken or seasoned ground beef for heartier bites. For vegetarian versions, try black beans or lentils mixed with roasted veggies. Fold in shredded cheddar cheese to add richness—sharp varieties melt beautifully into the creamy base.
Want a lighter option? Use low-fat cream cheese or swap sour cream with Greek yogurt. Corn tortilla wraps hold up well with chunky fillings, while spinach versions add color. “The key is balancing textures,” shares Chef Elena Martinez. “Crunchy veggies or crispy bacon bits take these from simple to spectacular.”
Adjusting Spice Levels to Taste
Control heat by tweaking your seasoning blend. Reduce chili powder for mild versions or add smoked paprika for depth. Fresh jalapeños bring bright heat, while pickled ones offer tangy spice. Always taste the filling before spreading—adjust gradually to avoid overpowering other flavors.
| Spice Level | Add-In | Effect |
|---|---|---|
| Mild | Bell peppers | Sweet crunch |
| Medium | Chipotle powder | Smoky warmth |
| Hot | Diced habanero | Fiery kick |
For party menus, create a build-your-own station with different fillings and wraps. Label each variation with fun names like “Tex-Mex Twister” or “Cool Ranch Roller.” This interactive approach lets guests customize while keeping your prep straightforward.
Serving Suggestions and Dipping Pairings
Elevate your appetizer game by pairing these zesty bites with vibrant accompaniments. Thoughtful presentation and complementary flavors turn simple snacks into memorable culinary experiences. Balance textures and colors to create visual appeal that matches the bold taste.
Creative Plating Ideas
Arrange spirals in a sunburst pattern on a rustic wooden board. Alternate colors using spinach or tomato tortillas for contrast. Place a bowl of lime wedges at the center for guests to add brightness.
| Theme | Plating Style | Garnish |
|---|---|---|
| Southwest Fiesta | Tiered stand with chili lights | Cilantro sprigs |
| Modern Minimalist | White slate with negative space | Microgreens |
| Family-Style | Large platter with dipping wells | Radish slices |
Pairing With Salsa and Other Dips
Offer three contrasting dips: chunky guacamole for creaminess, fiery salsa verde for heat, and cool Greek yogurt ranch. “Dips should highlight, not overpower,” advises Chef Marco Diaz. “Use small ramekins to keep flavors distinct.”
| Dip | Texture | Best For |
|---|---|---|
| Roasted red pepper hummus | Silky | Protein boost |
| Mango habanero salsa | Chunky | Sweet heat balance |
| Avocado crema | Creamy | Cooling contrast |
Keep platters chilled throughout the day by nesting them over ice-filled trays. Pair with grilled shrimp skewers or black bean salad for light protein options. Refresh tortilla edges with a quick spritz of water before final arranging.
Expert Tips for Flavor and Texture
Mastering the balance of spices and textures turns good appetizers into unforgettable ones. Whether you’re new to this dish or refining your technique, these insights ensure consistent results every time.
DIY Taco Seasoning Secrets
Skip store-bought packets and create your signature blend. Combine 1 tbsp chili powder, 1 tsp cumin, and ½ tsp smoked paprika. Toast the spices briefly in a dry pan to unlock deeper aromas.
- Add cocoa powder for earthy complexity
- Use fine sea salt to control sodium levels
- Mix in dried oregano for herbal brightness
“Always taste your seasoning mix before adding it to the filling,” advises Chef Luis Rivera. “Adjust in small increments—you can’t undo an over-spiced batch.”
Troubleshooting Common Issues
If your filling feels too soft, refrigerate it for 20 minutes before spreading. For soggy tortillas, lightly toast them in a skillet first. Store assembled rolls in an airtight container to prevent drying.
| Issue | Quick Fix | Prevention Tip |
|---|---|---|
| Crumbly slices | Add 1 tbsp sour cream | Chill rolls fully |
| Bland flavor | Double the seasoning | Toast spices |
| Leaking filling | Use thicker tortillas | Leave edge bare |
Follow printed instructions closely for your first attempt. Once comfortable, pin your favorite variations to recreate later. Always label freezer containers with dates—these keep best for 3 weeks. I think you’ll like this too.
Gluten Free Lunch ideas: Easy and Delicious Recipes for Every Taste
Conclusion
Bringing together simple ingredients and bold flavors creates an appetizer that’s as fun to make as it is to eat. Layer your creamy base, roll tightly, and slice—these three steps deliver crowd-pleasing spirals every time. Their make-ahead nature means you can focus on guests instead of last-minute prep.
Whether using homemade taco seasoning or a quality store-bought packet, balance is key. “The magic lies in blending fresh elements with pantry staples,” notes Lisa Longley. Inspired by Charm adds: “Don’t shy from swaps—try shredded cheddar cheese one week, pepper jack the next.”
Adjust spice levels or add proteins like seasoned turkey for heartier bites. Share your creations online using #FlavorFiesta—your twist might inspire others. Ready to wow your next gathering? Grab tortillas and make taco pinwheels your signature party starter. I think you’ll like this too.