
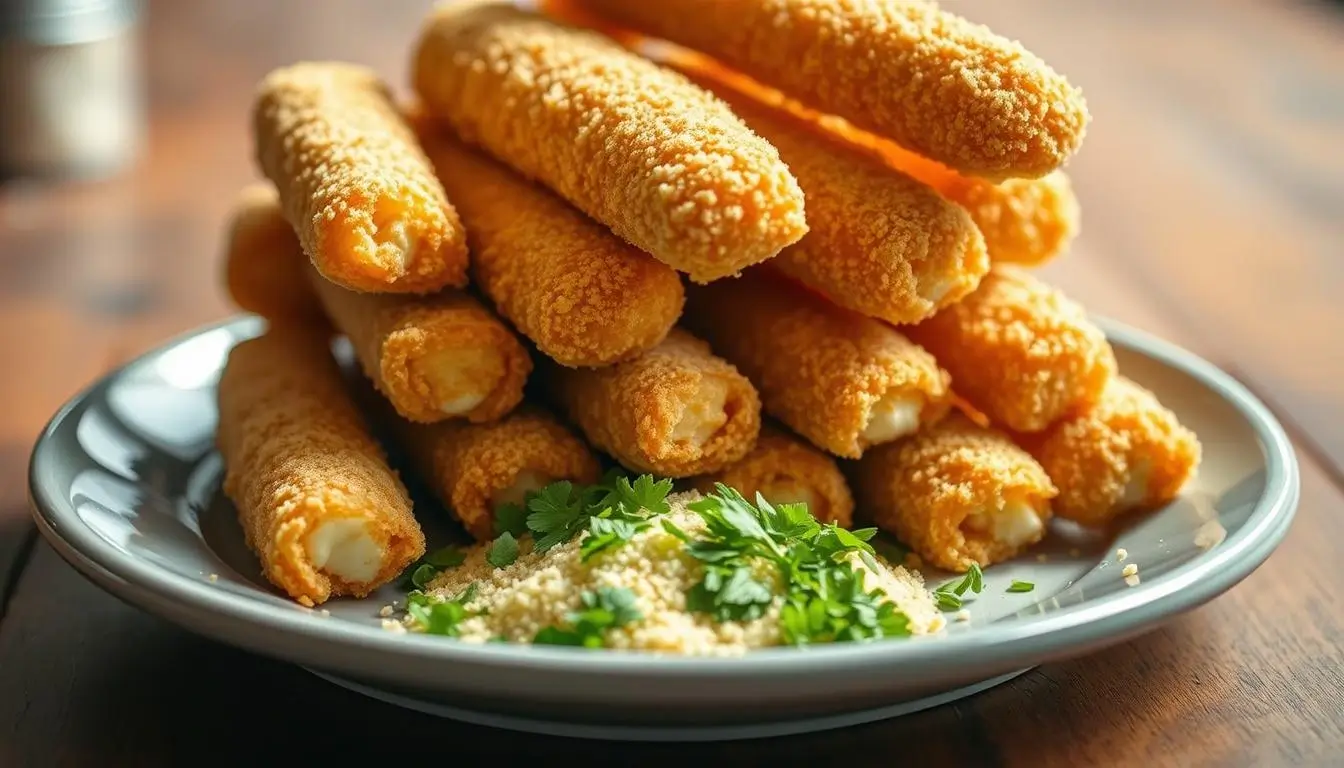
Crispy Mozzarella Sticks: Ever wanted that perfect golden crunch of a restaurant snack but got limp, greasy ones from the freezer? You’re not alone. There’s magic in biting into a freshly fried snack with molten cheese. But getting that crispiness and gooeyness at home seems hard.
What if you could make better-than-takeout results at home? It’s easier than you think. With a few basic ingredients and tools, you can make crispy exteriors and perfectly melted cheese every time. Say goodbye to soggy store-bought sticks and hello to homemade goodness.
This guide will show you how to make these crowd-pleasers. You’ll learn to use everyday tools and avoid deep fryers. Imagine impressing friends with golden-brown bites that stay crunchy even after dipping.
Key Takeaways
- Homemade versions let you avoid preservatives and customize flavors.
- High-quality cheese ensures a rich, stretchy center.
- A double-coating method locks in crunch during frying.
- Freezing the sticks before cooking prevents leaks.
- Standard pans work just as well as specialized fryers.
- Fresh herbs or spices can elevate the breading’s taste.
Introduction to Homemade Mozzarella Sticks
Store-bought snacks often have unknown ingredients and cooking methods. Making these cheesy treats yourself means you control what’s in every bite. No mystery additives or rushed frying techniques.
Why You Should Make Them at Home

Pre-packaged snacks can’t match the texture of fresh ones. Your kitchen lets you adjust breading thickness and spice levels. Want smoky paprika or garlic powder? Add it. Prefer gluten-free flour? Swap it.
You’ll also avoid uneven results. Restaurants sometimes reuse oil, leading to greasy outcomes. At home, clean oil and proper temperature create golden perfection without sogginess.
| Factor | Homemade | Store-Bought |
|---|---|---|
| Ingredient Control | Full customization | Preservatives common |
| Texture | Crisp coating, melted center | Often limp or chewy |
| Cooking Oil | Fresh, single-use | Reused batches |
| Flavor Options | Unlimited spices | Basic seasoning |
The Fresh Taste Advantage
High-quality cheese makes all the difference. Fresh blocks melt smoothly compared to pre-shredded varieties with anti-caking agents. Pair them with herbs from your garden for bright, vibrant flavors.
Timing matters too. Frying immediately after coating ensures maximum crunch. This approach locks in heat so each stick stays intact when dipped in marinara or ranch.
Key Ingredients for a Perfect Coating
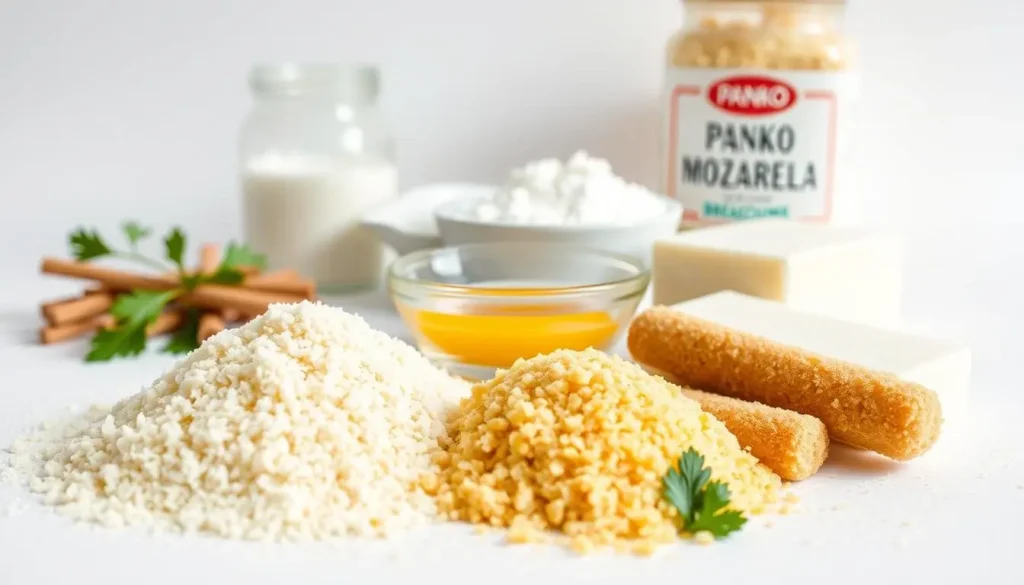
The secret to golden, flavorful cheese sticks lies in the components you choose. Each layer—from the dredging station to the final breading—plays a critical role in achieving that satisfying crunch and rich taste. Let’s break down what truly matters in your kitchen setup.
Essential Seasonings and Spices
Your seasoning blend is where flavor comes alive. Italian seasoning adds earthy depth, while garlic powder delivers a savory kick. A pinch of salt isn’t optional—it amplifies every other ingredient. “These three work like a symphony,” says one chef. “Skip one, and the balance falters.”
Mix spices directly into the panko for even distribution. This ensures every bite carries the same bold profile. Want heat? Add chili flakes. Craving herbs? Fresh basil works wonders.
Choosing the Right Mozzarella
Low-moisture mozzarella is best. It keeps its shape when fried, stopping leaks. Avoid pre-shredded cheese with starches that mess with melting. Instead, use blocks and slice them yourself.
String cheese is a smart choice for beginners. Its uniform shape and consistent texture make it perfect. Just freeze the sticks before coating to keep them firm.
Essential Tools and Equipment
You don’t need a fancy kitchen to make great snacks at home. Basic tools you likely have will get you golden results. Choose versatile tools that work for frying, baking, or air frying.
Deep Fryer, Oven, and Air Fryer Options
A countertop fryer helps with temperature control, but it’s not essential. Use a heavy pot for stovetop frying instead. For lighter options, bake on a baking sheet or use an air fryer basket. Both methods give you crunch with less oil.
Three things are must-haves: mixing bowls for dredging, a baking sheet for freezing, and a resealable bag for coating. Line trays with parchment paper to prevent sticking and make cleanup easier. You don’t need fancy gadgets—just efficient prep space.
Pro tip: If using an air fryer, lightly spray sticks with oil before cooking. This gives them a crispy feel like deep-frying. Whichever method you pick, keep a thermometer ready. Even heat prevents soggy coatings or burst cheese.
Remember, simplicity is key. Your everyday pans and bowls are the secret to making crowd-pleasing appetizers. Now, let’s get started.
How to Make Crispy Mozzarella Sticks
Creating golden, crunchy appetizers starts with technique. The magic is in the coating process. Layering ingredients locks in flavor and prevents leaks. Follow these steps to turn simple ingredients into delicious snacks.
Dredging and Double-Coating Techniques
Set up three shallow bowls: flour, beaten eggs, and seasoned panko. Dip each cheese piece first in flour, shaking off excess. Then, coat it in the egg mixture, letting drips fall away. Repeat the egg dip before pressing into breadcrumbs for a thick, even layer.
This double-coating method stops oil from getting in. Freeze coated sticks for 30 minutes on a parchment-lined tray. This step helps the breading stick during frying.
Step-by-Step Cooking Instructions
Heat 2 inches of oil in a heavy pot to 350°F. Fry sticks in batches for 2-3 minutes until golden brown. Drain on a wire rack—not paper towels—to keep them crunchy.
No deep fryer? Bake at 425°F for 10-12 minutes or air fry at 400°F for 8 minutes. Whichever method you choose, don’t overcrowd the cooking space. Proper heat circulation gives you that restaurant-quality texture every time.
The Importance of Freezing for Crunchy Results
Ever wondered why your breading sometimes slides off in the oil? The answer is freezing. It’s the secret weapon for achieving that satisfying crunch you crave.
Why Freeze Before Frying?
Chilling your coated snacks solidifies the breading, creating a protective shield. This prevents the coating from absorbing too much oil or peeling away during cooking. Think of it as pressing “pause” on the mixture—letting everything bind tightly to the cheese.
Without this step, heat melts the core too quickly. The result? A gooey mess instead of golden perfection. A 30-minute freeze lets the freezer work its magic, ensuring each bite stays intact from fryer to plate.
Making Ahead and Storage Tips
Freeze batches in advance to save time. Lay sticks flat on a tray to prevent sticking. Once frozen, put them in a ziploc bag with the date. They last up to 3 months.
- Freeze for at least 1 hour before cooking
- Use parchment paper between layers if stacking
- Make sure your freezer is set to 0°F (-18°C) for optimal results
When ready to fry, skip thawing. Cook straight from frozen for a crispy texture. This trick saves time and ensures a restaurant-quality snack every time.
Tips for Successful Frying, Baking, and Air Frying
Temperature control is key for crispy results. Whether using oil, oven, or air fryer, precise heat is essential. This avoids greasiness and ensures golden results.
Monitoring Oil Temperature and Timing
For stovetop frying, a thermometer is crucial. Keep the oil at 350°F. Too low, and it absorbs oil; too high, and it burns. Let the oil rebound to 350°F between batches.
Oven and air fryer users: Preheat well. Bake at 425°F for 12 minutes, flipping halfway. In air fryers, 400°F for 8 minutes works best. Keep sticks apart for airflow. “Crowding creates steam, which softens breading,” says a chef.
- Use a heavy pot for stable oil temperature
- Check oven racks for even heat distribution
- Shake air fryer baskets gently mid-cycle
- Rest cooked sticks 2 minutes before serving
Timing varies by appliance, but look for even browning. With practice, you’ll get it right every time, no matter the tool.
Serving Suggestions and Delicious Dipping Sauces
The right dip can make your snack unforgettable. Pair golden, cheesy bites with bold sauces for a flavor explosion. Let’s explore how to elevate your appetizer game.
Pairing with Marinara and Other Sauces
Marinara sauce is a classic for a reason. Its acidity balances rich cheese. For a twist, add roasted garlic or basil ribbons. For heat, mix in crushed red pepper flakes.
Try these crowd-pleasing options:
| Sauce Type | Flavor Profile | Best With |
|---|---|---|
| Creamy Ranch | Cool & Tangy | Smoky paprika-coated sticks |
| Garlic Aioli | Rich & Savory | Herb-infused breading |
| Spicy Sriracha Mayo | Bold & Zesty | Plain or lightly seasoned sticks |
Serve immediately after cooking. A warm platter keeps the coating crisp. Garnish with fresh parsley or grated Parmesan for a nice touch.
Whether using string cheese or block-cut pieces, these sauces enhance every bite. For gluten-free or low-carb diets, offer multiple dip options. The perfect pairing turns a simple snack into a memorable experience.
Conclusion
Making your own mozzarella sticks is easier than you think. You get to control the flavor and texture. Say goodbye to bland or greasy snacks.
Start with smart prep. Use low-moisture cheese for a stretchy center. Double-coat with seasoned breadcrumbs for a crunchy shell. Add black pepper or garlic powder for extra flavor.
Try different spice blends like chili powder or cracked pepper. Freezing is key to keeping everything together during frying.
Use string cheese for convenience or try different dipping sauces. Opt for pre-cut string cheese to save time. With the right oil temperature and timing, your cheese sticks will be irresistible.
Share these mozzarella sticks at parties or enjoy them as a quick snack. Your kitchen will be the new hotspot for delicious results. I suggest you this recipe, you will like it very much Crispy Mozzarella Sticks
Chicken Cutlets in Oven: Juicy, Crispy & Perfect Tonight!
FAQ
What makes homemade cheese sticks better than store-bought?
Homemade versions let you control ingredients. You get fresher cheese and balanced seasoning. You can also adjust spices or baking methods to reduce fat content while keeping flavor.
Can I use pre-shredded cheese for this recipe?
Avoid pre-shredded varieties—they often contain additives that prevent melting. Opt for low-moisture blocks or string cheese, which hold their shape better during frying or baking.
Do I need a deep fryer to make these?
No. An oven or air fryer works for lighter results. If frying, a heavy pot with 2–3 inches of oil and a thermometer will achieve similar crispiness without specialized equipment.
Why freeze the sticks before cooking?
Freezing solidifies the coating, preventing cheese leakage and ensuring a crunchy exterior. It also helps the breading adhere during high-heat cooking methods like frying or air frying.
How do I prevent the coating from falling off?
Use a double-dredge method: dip in flour, then egg wash, then seasoned crumbs. Repeat once more for extra adhesion. Chill between layers if time allows.
What oil temperature is ideal for frying?
Maintain 375°F (190°C). Too low, and they’ll absorb excess oil; too high, and the coating burns before the cheese melts. Use a thermometer and fry in small batches.
Can I prepare these ahead of time?
Yes. After breading, freeze uncooked sticks on a tray, then transfer to airtight bags for up to 3 months. Cook directly from frozen—no thawing needed.
What dips pair well with this snack?
Classic marinara works, but try ranch, garlic aioli, or spicy arrabbiata. For sweetness, honey mustard or balsamic glaze balances the salty cheese flavor.