
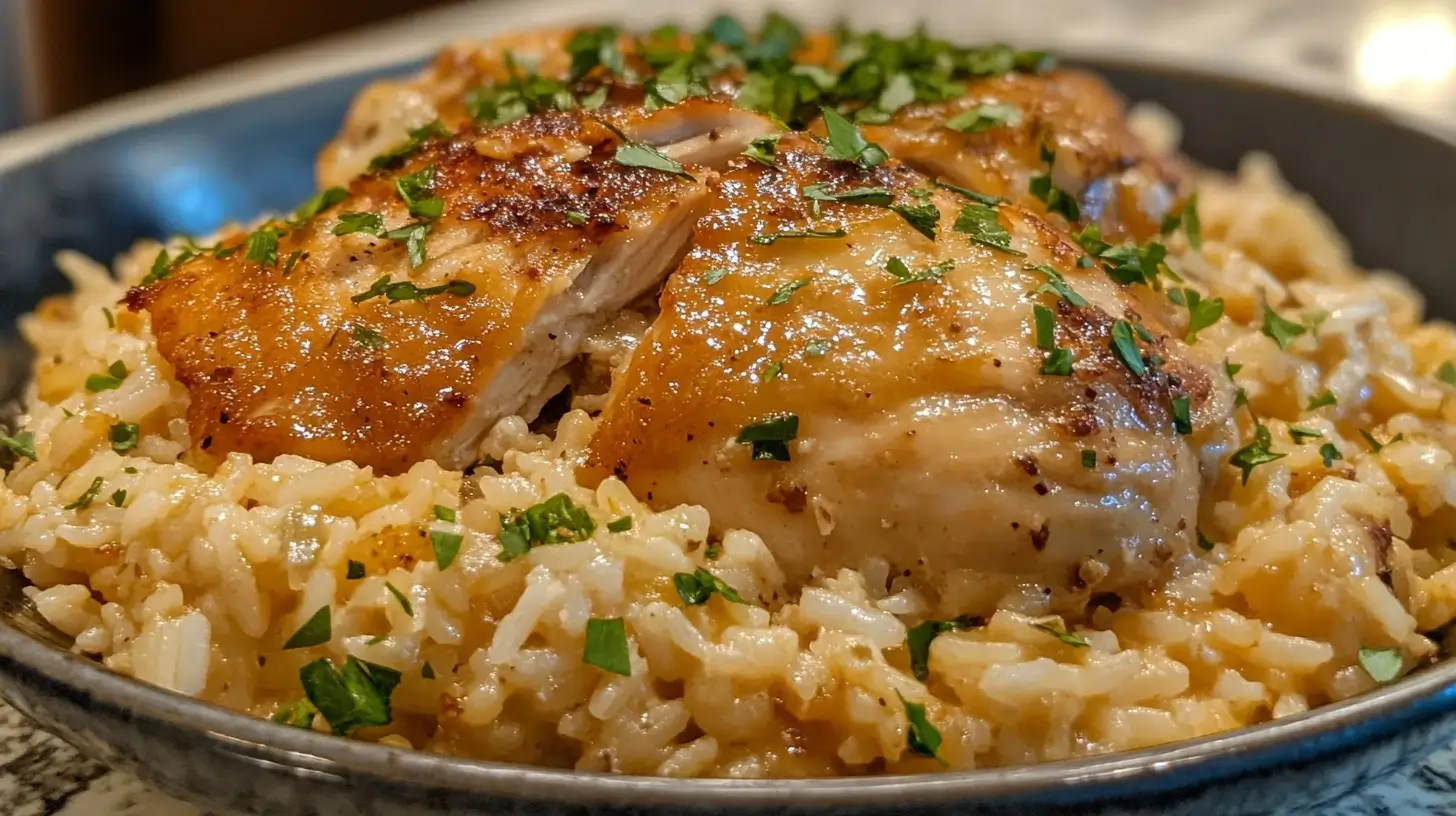
Creamy Smothered Chicken and Rice: When hunger calls for something hearty, few meals hit the spot like a savory one-pan dinner. This flavorful dish combines tender poultry with fluffy grains, all coated in a velvety sauce that’s both rich and balanced. It’s the kind of meal that feels indulgent yet requires minimal effort—perfect for weeknights when time is tight.
The magic lies in the method. Searing locks in juices, while simmering melds spices and herbs into every bite. Whether you’re new to cooking or a seasoned pro, the process stays straightforward. You’ll layer textures and flavors in a single skillet, cutting down on cleanup without sacrificing taste.
Families love how versatile this recipe can be. Swap herbs, adjust spice levels, or add veggies to make it your own. Leftovers? They reheat beautifully, making weekday lunches just as satisfying. Below, we’ll break down prep shortcuts, cooking hacks, and storage tricks to ensure success every time.
Key Takeaways
- One-pan comfort food with a rich, creamy sauce
- Combines seared poultry and perfectly cooked grains
- Simple enough for busy evenings
- Uses techniques like simmering for depth of flavor
- Customizable with herbs, spices, or vegetables
- Meal prepping-friendly with easy reheating
Introduction to This Comforting Recipe
There’s a reason this hearty meal has earned a permanent spot in family meal rotations. Its golden-brown seared poultry rests atop fluffy grains, all enveloped in a luscious cheese-infused sauce. The result? A harmony of textures and aromas that feels both familiar and exciting.
Understanding the Appeal
What sets this recipe apart is its layered approach. Searing locks in moisture, while oven baking ensures even heat distribution. A 20-minute simmer allows herbs and spices to meld, creating depth without overwhelming the palate. It’s a masterclass in balancing richness with subtlety.
Busy cooks appreciate the efficient workflow. Prep takes under 15 minutes, and hands-off cooking time lets you multitask. Plus, the dish adapts effortlessly—swap cheddar for pepper jack or add roasted veggies for extra crunch.
Overview of Techniques and Flavors
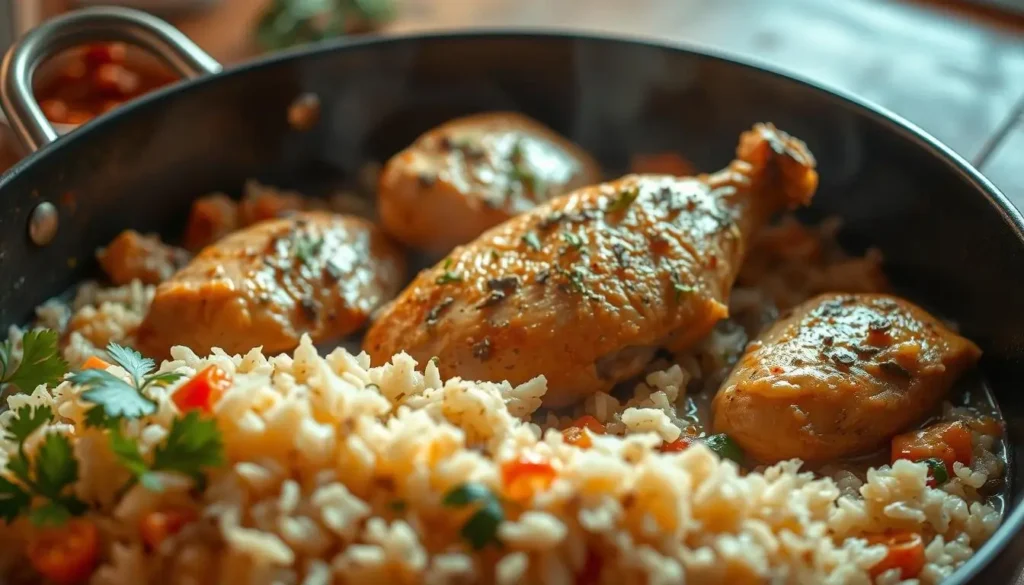
Two-phase cooking delivers consistent results. Start on the stovetop to develop fond (those tasty browned bits), then transfer to the oven for gentle finishing. This dual method ensures tender meat and perfectly absorbed grains.
Key elements include:
- Umami-packed seasonings like garlic powder and smoked paprika
- A velvety sauce base thickened with broth and cream
- Fresh parsley or chives for a bright finish
Up next, we’ll explore ingredient selection and pro tips for maximizing flavor at every step. Whether you’re meal prepping or serving a crowd, these insights guarantee crowd-pleasing results.
Key Ingredients and Flavor Components
Great meals start with quality components. This dish relies on a trio of creamy elements: condensed cream of chicken soup, cream of mushroom soup, and rich chicken broth. These form the base that coats every grain of white rice, creating a velvety texture without heavy cream.
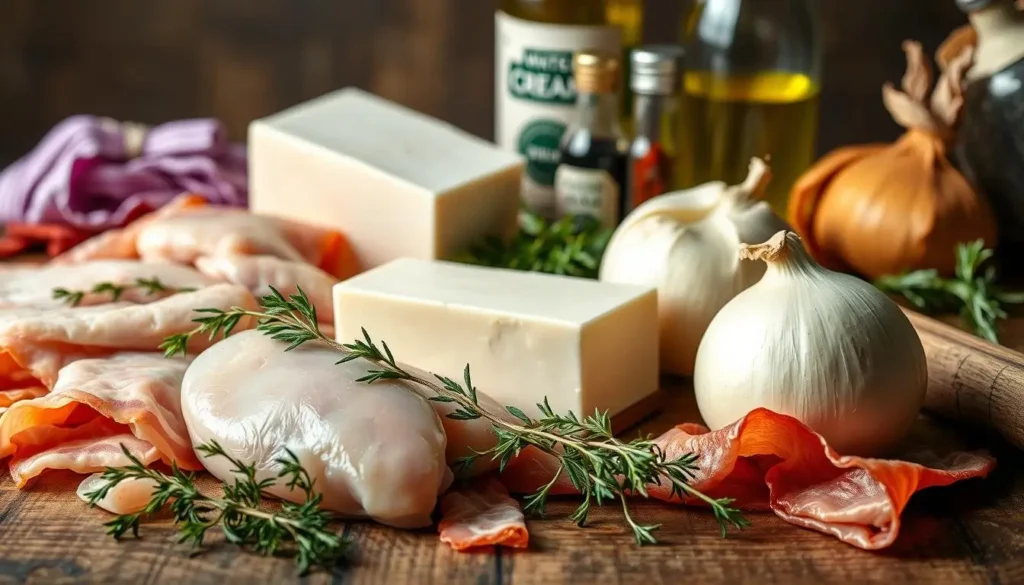
Cheese plays a starring role. Sharp cheddar melts seamlessly into the mixture, adding tangy depth. For best results, use 1.5 cups shredded cheese—pre-shredded varieties often contain anti-caking agents that affect smoothness.
Fresh yellow onion is non-negotiable. When sautéed, it releases natural sugars that balance savory flavors. Combine this with garlic powder and black pepper for a seasoning blend that enhances without overpowering.
| Ingredient | Purpose | Quantity |
|---|---|---|
| Cream soups | Base thickness | 2 (10.5 oz) cans |
| Chicken broth | Flood moisture | 1.5 cups |
| Long-grain white rice | Texture foundation | 1 uncooked cup |
Precision matters. Too much broth? Your rice turns mushy. Too little? The grains stay crunchy. Stick to the cup measurements listed—they’re tested to achieve ideal absorption.
Pro tip: Rinse white rice thoroughly before mixing. This removes excess starch, preventing clumping. The result? Fluffy grains that soak up the cheese-infused sauce perfectly.
Prepping and Searing the Chicken
A golden sear isn’t just about looks—it’s where flavor gets its start. Proper technique here builds layers of taste while keeping poultry juicy. Let’s break down the essentials for preparing protein that stays tender and absorbs seasonings fully.
Seasoning and Prepping for Optimal Flavor
Begin with skinless chicken breasts—their lean texture absorbs spices better. Pat them dry with paper towels; moisture is the enemy of browning. Mix 1 teaspoon each of salt, black pepper, and garlic powder with ½ teaspoon paprika. Rub this blend onto every inch.
“Seasoning generously matters more than you think,” says chef Maria Weston. “It creates a flavor base that carries through the entire dish.” Let the meat rest for 5 minutes so spices adhere.
Perfecting the Searing Technique
Heat olive oil in a heavy skillet over medium-high until shimmering. Add breasts without crowding—they should sizzle on contact. Cook 2-3 minutes per side until a caramelized crust forms. This step locks in juices but doesn’t fully cook the meat.
Transfer seared pieces to a plate and set aside. That fond left in the pan? It’s liquid gold for building sauce later. Use tongs to handle poultry—forks pierce and release precious moisture.
Sautéing Vegetables for a Flavor Boost
Building depth in your meal starts with the sizzle of fresh produce hitting a hot pan. This step transforms humble ingredients into aromatic foundations that elevate every bite. By using the same skillet from searing, you capture those flavorful browned bits left behind.
Selecting the Right Vegetables
Onions and green bell peppers form the classic duo here. Choose firm, glossy peppers and onions with tight, papery skins. Dice them uniformly—about ½-inch pieces—to ensure even cooking. “Size matters more than you’d think,” notes chef Ellie Kramer. “Too small, and they’ll vanish; too large, and they overpower.”
Tips for Achieving the Ideal Sauté
Heat the pan over medium until those precious drippings shimmer. Add veggies and let them sit untouched for 60 seconds to develop color. A quick splash of broth loosens stuck-on bits while adding moisture. Stir occasionally until edges soften but retain a slight crunch—about 4 minutes.
If prepping ingredients separately, mix them in a bowl first for even distribution. This ensures every spoonful of your dish gets balanced flavor. Properly cooked vegetables should taste sweet, not mushy, creating a savory side that complements the main components.
This technique isn’t just about texture—it’s flavor alchemy. Caramelized edges meet tender centers, forming a base that carries herbs and spices through the entire cooking process. Master this step, and your meals gain restaurant-worthy complexity with home-kitchen ease.
Combining Creamy Sauces and Rice
The secret to a perfectly cohesive dish lies in merging textures and flavors during assembly. By blending pantry staples with fresh components, you create a foundation where every grain becomes infused with savory richness.
Creating a Smooth, Creamy Base
Start by whisking condensed soups with broth until silky. Gradually fold in uncooked long-grain rice, making sure each piece gets coated. “Constant stirring prevents clumps,” advises chef Derek Mills. “It’s like building a flavor blanket for the grains.”
Transfer this mixture to a 9×13-inch baking dish, spreading sautéed vegetables evenly across the surface. The even distribution ensures consistent texture in every spoonful.
Ensuring Even Rice Absorption
Cover the dish tightly with foil before placing it in a preheated oven. This traps steam, allowing grains to plump up while absorbing liquid. Bake at 375°F for 25 minutes, then remove the foil for the final 10 minutes.
| Component | Role | Tip |
|---|---|---|
| Cream soups | Thickening agent | Use room-temperature broth |
| Uncooked rice | Flavor carrier | Rinse twice to remove starch |
| Foil cover | Moisture lock | Seal edges completely |
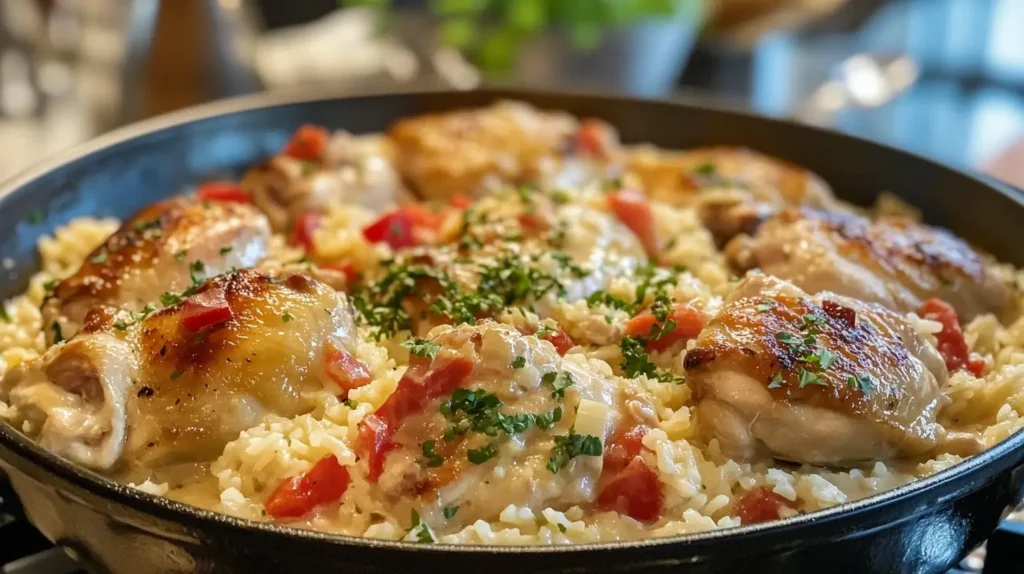
A sprinkle of sharp cheese adds golden texture during the last bake. Let the dish rest 5 minutes after cooking—this lets flavors settle while keeping the sauce velvety.
Essential Techniques for Creamy Smothered Chicken and Rice
Mastering technique transforms good dishes into memorable ones. Whether you’re working with limited time or aiming for restaurant-quality results, these methods ensure tender protein and bold flavors every time.
One-Pan Efficiency vs. Oven Baking
Stovetop cooking shines for speed. A heavy skillet retains heat, letting you sear poultry and simmer sauces in one vessel. This approach preserves fond—those caramelized bits that add depth to the final dish.
Oven baking offers hands-off consistency. Transferring to a 375°F oven ensures even heat around skinless chicken breasts, preventing dry edges. “The enclosed environment keeps moisture locked in,” explains chef Tamara Reeves. “It’s ideal for busy cooks who need reliability.”
| Method | Best For | Time |
|---|---|---|
| One-Pan | Quick weeknights | 35 minutes |
| Oven Baking | Even doneness | 45 minutes |
Layering Flavors with Cheese & Seasonings
Sharp cheddar melts best when added in stages. Stir half into the sauce base, then sprinkle the rest before serving. This creates pockets of gooey richness without overwhelming the palate.
For tangy complexity, mix 1 teaspoon ranch seasoning into the broth. It complements garlic powder and paprika while keeping the dish approachable. Always taste as you go—seasonings intensify during cooking.
“Cheese isn’t just a topping—it’s a texture tool. Melted cheddar binds ingredients, while crispy edges add contrast.”
Proper searing remains non-negotiable. Golden-brown crusts on breasts create visual appeal and lock in juices. Pair this with measured liquid ratios to prevent soggy grains or dry meat.
Variations and Customizations for Your Taste Buds
The beauty of this recipe lies in its adaptability. While the classic version delivers comfort, small tweaks can transform it into new experiences. Whether swapping proteins or dialing up heat, these changes keep meals exciting without losing the dish’s soul.
Spicy Kick and Herb Swaps
For richer texture, try chicken thighs instead of breasts. Their higher fat content stays juicy during baking. Sear them skin-side down first for crispy edges that contrast the creamy sauce.
Heat lovers can stir red pepper flakes into the broth mixture. Start with ¼ teaspoon and adjust to taste. Fresh herbs like thyme or rosemary add earthy notes—toss a sprig into the baking dish before covering with foil.
Not into cheddar? Swap in Monterey Jack or gouda for milder flavors. Stir in sautéed mushrooms or spinach during assembly for extra veggie power. These tweaks work in most recipes, letting you personalize each batch.
Remember: The core technique remains unchanged. Sear protein, build sauce, then bake. This flexibility makes the dish ideal for using leftovers or catering to dietary needs. Even with swaps, every bite stays comforting and satisfying.
Storage, Reheating, and Leftover Tips
Leftovers shouldn’t mean compromise. With proper handling, this dish stays just as satisfying days later. Follow these guidelines to preserve texture and flavor while avoiding food waste.
Proper Storage and Freezing Guidelines
Cool leftovers completely before transferring to airtight containers. Refrigerate for up to 3 days—any longer, and the white rice may dry out. For freezing, portion individual servings into freezer-safe bags. Remove excess air and label with dates. Frozen portions stay fresh for 2 months.
Reheating Techniques to Retain Flavor
Revive your meal without sacrificing quality:
- Stovetop method: Warm portions over low heat with a splash of broth. Stir gently to redistribute moisture
- Oven approach: Cover with foil and bake at 325°F for 15-20 minutes
- Microwave hack: Place a damp paper towel over the plate to prevent rubbery textures
For even heating, break up clumped white rice before reheating. A quick stir halfway through ensures every bite stays creamy. Leftovers also shine as a side—mix with scrambled eggs for a hearty breakfast skillet.
“Always add liquid when reheating. A tablespoon of broth or milk reactivates the sauce’s richness.”
| Storage Method | Duration | Key Tip |
|---|---|---|
| Refrigeration | 3 days | Separate sauce-heavy portions |
| Freezing | 2 months | Use flat containers for faster thawing |
Conclusion
The journey from pantry staples to a satisfying dinner is shorter than you think. This dish combines golden-seared poultry with aromatic vegetables and fluffy grains, all baked to perfection in a single baking dish. Whether using lean breasts or juicier thighs, the method remains forgiving—ideal for both new cooks and seasoned pros.
Versatility shines through customizable spice blends and ingredient swaps. Add roasted peppers for sweetness or chili flakes for heat. Proper searing and measured liquid ratios ensure tender meat and perfectly textured chicken rice every time.
Meal preppers will appreciate how leftovers maintain their quality. Store portions in airtight containers, then reheat with a splash of broth to revive the creamy texture. A reliable thermometer helps monitor doneness without guesswork.
At its core, this smothered chicken recipe proves comfort food doesn’t need complexity. With foundational techniques and quality tools, you’ll create crowd-pleasing meals that adapt to any craving or schedule.
Tasty Turmeric Rice Chicken Dinner: A Weeknight Favorite
Creamy Smothered Chicken and Rice
FAQ
Can I use chicken thighs instead of breasts?
Yes! Bone-in, skinless thighs work well. Adjust cooking time by 5–7 minutes since they’re thicker. Sear them first for a crispy texture.
What vegetables pair best with this recipe?
Onion, garlic, and bell peppers add depth. For crunch, try celery or carrots. Avoid watery veggies like zucchini to keep the sauce rich.
How do I prevent the rice from becoming mushy?
Rinse grains before cooking to remove excess starch. Use a 2:1 liquid-to-rice ratio and avoid stirring once it simmers. Check doneness at 18 minutes.
Can I make this dish spicy?
Absolutely. Add ¼ teaspoon cayenne or red pepper flakes to the seasoning mix. Top with diced jalapeños or hot sauce before serving.
Is a Dutch oven necessary for one-pan cooking?
A heavy-bottomed skillet or deep sauté pan works too. Ensure it’s oven-safe if finishing under the broiler for a golden cheese crust.
Can I substitute cheddar with another cheese?
Monterey Jack or Gouda melts smoothly. For tang, mix in a splash of cream cheese or Parmesan. Avoid low-fat varieties to maintain creaminess.
How long can leftovers stay fresh in the fridge?
Store in airtight containers for up to 3 days. Reheat gently on the stovetop with a splash of broth to revive the sauce’s texture.
Can I freeze this meal for later?
Freeze before adding dairy-based sauces. Thaw overnight, then warm in a 325°F oven. Stir in cheese or cream after reheating.
What’s the best way to reheat without drying the chicken?
Cover with foil and bake at 350°F for 15–20 minutes. Use a meat thermometer to ensure internal temps reach 165°F without overcooking.
Are fresh herbs better than dried for seasoning?
Fresh thyme or parsley adds brightness, but dried herbs like rosemary or oregano hold up well during longer simmer times. Adjust quantities to taste.