

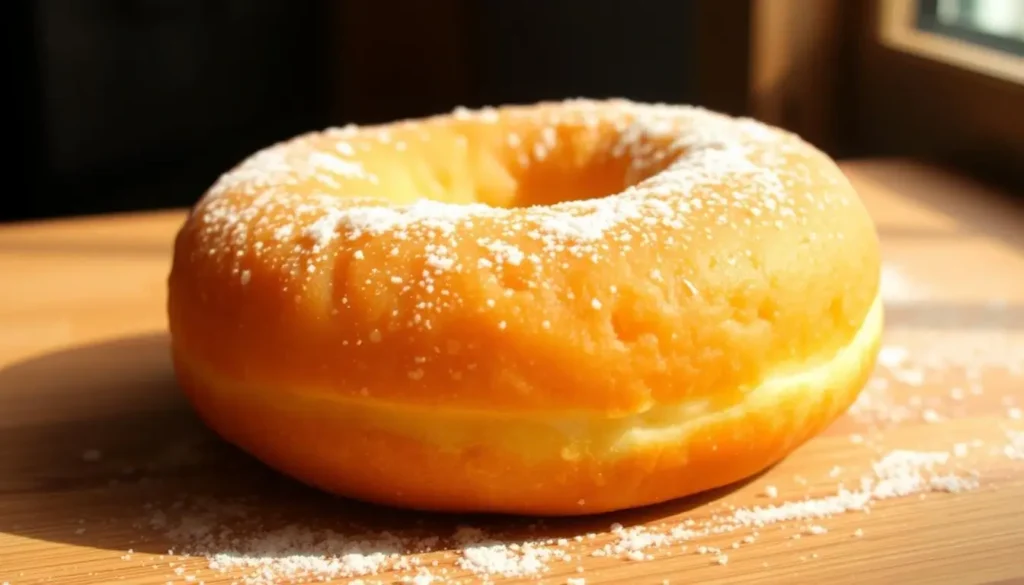
Craving something sweet but want to skip the guilt? Meet your new favorite treat: fluffy, oven-baked delights that rival traditional fried versions. These goodies are ultra soft, moist, and bursting with flavor—all while cutting back on oil and calories. Perfect for breakfast or dessert, they’re a crowd-pleaser that won’t weigh you down.
This guide walks you through a simple recipe using pantry staples like baking powder and sugar to create a light, airy texture. You’ll learn how mixing basic ingredients and preheating your oven can lead to bakery-quality results in minutes. Customize them with glazes, sprinkles, or cocoa powder for endless variety.
Even beginners can master this method. The process skips messy frying, making cleanup a breeze. Many home bakers swear their homemade batches taste fresher than store-bought options. Ready to bake smarter—and tastier?
Key Takeaways
- Healthier than fried alternatives with fewer calories and less grease
- Easy recipe using common ingredients like baking powder and sugar
- Customizable flavors and toppings for personal preferences
- Light, fluffy texture achieved through proper oven preparation
- Quick preparation time compared to traditional frying methods
- Fresh results that often surpass commercial bakery versions
Introduction and Why You’ll Love Baked Donuts
Imagine waking up to warm, fragrant treats that satisfy cravings without derailing your wellness goals. These oven-made goodies deliver the same cozy comfort as classic fried versions but with smarter ingredients and a streamlined process. Perfect for rushed mornings or leisurely brunches, they adapt effortlessly to any occasion.
Overview of the Recipe Benefits
This method skips the fryer entirely, cutting fat content by up to 40% compared to traditional recipes. A single batch uses just one bowl and common pantry items—flour, sugar, and a dash of cinnamon for that signature spiced warmth. You’ll spend more time enjoying them than cleaning up.
Key advantages include:
- Ready in under 30 minutes from mixing to glaze
- Customizable toppings like dark chocolate drizzle or crushed nuts
- No specialty equipment beyond a standard muffin tin
The Healthier Twist on a Classic Favorite
By using baking powder instead of yeast, these treats achieve a light crumb without heavy oils. Swapping buttermilk for regular milk adds tanginess while keeping moisture levels high. As one home cook notes:
“I was shocked how fluffy they turned out—way better than the greasy diner version!”
The recipe’s flexibility shines with simple swaps. Use almond flour for gluten-free needs or reduce sugar by 25% without sacrificing texture. Whether dusted with powdered sweetness or dipped in vanilla glaze, every bite feels indulgent yet balanced.
Ingredients and Their Simple Substitutions
The foundation of any great recipe starts with quality components. Let’s break down what you’ll need to create light, tender treats that rival any bakery offering. Each ingredient plays a specific role, and smart swaps keep options flexible for dietary needs.
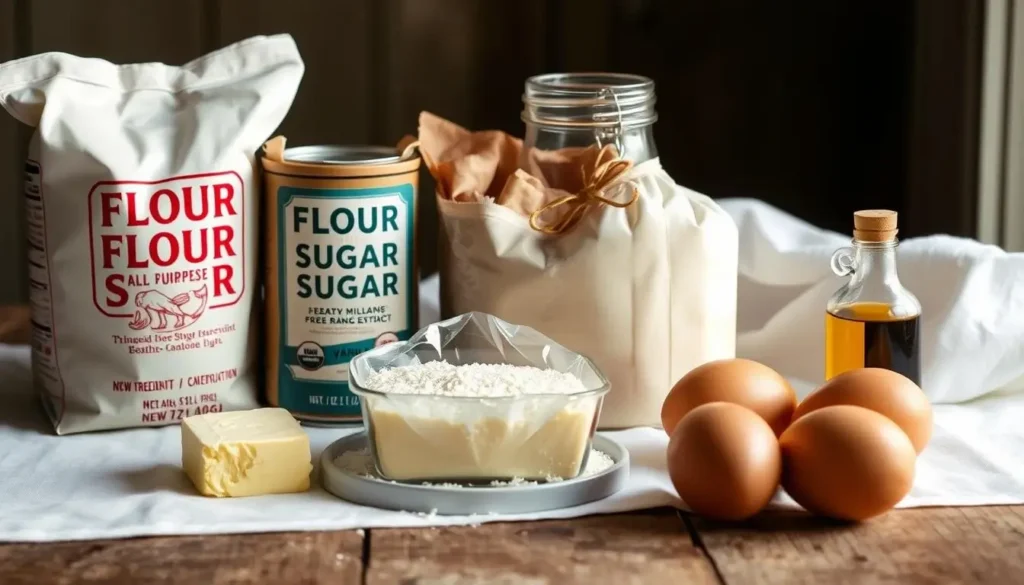
Dry Ingredients Essentials
Your base begins with 1¾ cups all-purpose flour—the backbone of the batter. Baking powder acts as the rising agent, while cinnamon adds warmth and salt balances sweetness. As one baker shared:
“Gluten-free flour works just as well if you need alternatives!”
Key dry components include:
- Flour (all-purpose or gluten-free blend)
- 1½ tsp baking powder for lift
- ½ tsp cinnamon for aromatic depth
- ¼ tsp salt to enhance flavors
Wet Ingredients and Flavor Enhancers
Richness comes from ½ cup melted butter and ⅔ cup milk, which keep the crumb moist. Vanilla extract adds floral notes, while sugar provides subtle sweetness. For dairy-free versions, try almond milk or coconut oil.
Measure precisely—too much flour creates density, while overmixing leads to toughness. Mix wet and dry elements just until combined (about 2 minutes) for optimal texture. Cake flour can replace all-purpose for extra tenderness, proving this recipe adapts to your pantry’s contents.
Essential Kitchen Tools for Perfect Donuts
Great results start with the right gear. Having proper equipment transforms messy kitchen experiments into seamless baking wins. Let’s explore the must-haves that guarantee consistent texture and shape every time.

Donut Pan and Measuring Tools
A non-stick pan with defined cavities ensures even baking and classic ring shapes. Opt for heavy-gauge steel—it distributes heat better than thin materials. Pair it with precise measuring cups and spoons to nail ingredient ratios. As one baker advises:
“Eyeballing measurements leads to dense results. Accuracy matters!”
Mixing Bowls and Piping Bags
Sturdy bowls handle vigorous mixing without slipping. Use a large one for dry ingredients and a smaller one for wet components. Transferring batter becomes foolproof with a piping bag or zip-top bag. Snip the corner for controlled filling—no drips or uneven distribution.
| Tool | Purpose | Benefit |
|---|---|---|
| Donut Pan | Shaping | Uniform baking |
| Measuring Cups | Accuracy | Consistent texture |
| Piping Bag | Batter transfer | Neat presentation |
| Mixing Bowls | Ingredient prep | Efficient workflow |
Keep tools organized before starting. This setup cuts prep time by 30% and lets you focus on creative toppings. With these essentials, you’ll master the process faster than frosting melts in summer heat!
Preparing the Donut Batter
The secret to airy treats lies in the chemistry of your mixing bowl. Proper technique activates leavening agents while balancing moisture and structure. Let’s break down how each step contributes to that perfect rise.
Mixing Dry Ingredients with Baking Powder and Spices
Start by sifting 1¾ cups flour with baking powder and spices. This aerates the mixture, ensuring even distribution of leavening agents. Clump-free dry ingredients create uniform air pockets during baking. A pastry chef once noted:
“Sifting is non-negotiable—it’s like giving your batter tiny balloons to lift it!”
Whisk cinnamon and salt into the flour blend. These flavor enhancers coat every starch molecule, preventing bland bites. Gentle folding preserves the powder’s lifting power—rough handling deflates potential fluffiness.
Combining Wet Ingredients to Create a Smooth Batter
In a separate bowl, whisk eggs, milk, and vanilla extract until silky. Melted butter adds richness while its fat content tenderizes the crumb. Pour this blend into dry ingredients slowly, stirring just until combined. Overmixing develops gluten, leading to toughness—stop when streaks of flour disappear.
The ideal batter resembles thick pancake mix. It should plop off your spoon but hold shape briefly. This consistency traps air bubbles from the baking powder, which expand in the oven’s heat. Master this balance, and you’ll unlock treats lighter than morning fog.
Filling the Donut Pan with Ease
Mastering pan-filling techniques transforms lumpy batter into picture-perfect treats. Proper distribution ensures uniform rising and golden edges. Let’s explore professional methods that guarantee consistent results every time.
Using a Piping Bag Effectively
Transfer your batter smoothly by spooning it into a piping bag. Snip ¾ inch off the tip for controlled flow. As one pastry chef advises:
“Hold the bag vertically and squeeze from the top—this prevents air bubbles and messy spills.”
Apply steady pressure while moving the bag in circular motions. Fill each cavity ⅔ full to leave room for expansion. Overfilling causes misshapen rings, while underfilling leads to flat results.
Key tips for success:
- Wipe the pan’s center post with oil to prevent sticking
- Use a standard 6-cavity pan for even heat distribution
- Tap the pan gently on your counter to release trapped air
Proper technique impacts texture. Too much batter activates excess baking powder, creating crumbly interiors. Too little leaves treats dense. Let them cool on a wire rack for 5 minutes before glazing—this preserves their delicate structure.
Baking Process: Temperature and Timing
Perfect results hinge on heat precision. Your oven becomes the conductor, orchestrating rise and texture through careful temperature management. Let’s break down how timing and thermal control work in harmony.
Preheat Oven to 350°F and Set Up Your Pan
Start by heating your oven to 350°F—this sweet spot activates baking powder gradually for even lift. As one culinary instructor notes:
“Rushing the preheat stage creates uneven browning. Patience pays in fluffiness!”
Grease your pan lightly with melted butter or nonstick spray. Center the rack to ensure heat circulates freely around the treats. For recipes using cinnamon sugar coatings, this prep step ensures toppings stick perfectly later.
Determining the Perfect Baking Duration
Set your timer for 11 minutes. Peek through the oven window at 10 minutes—edges should show a pale gold hue. Insert a toothpick; if it emerges clean, they’re done. Overbaking dries out the tender crumb.
Adjust based on your oven’s personality. Convection models might need 2 fewer minutes. Transfer to a wire rack immediately to halt cooking. Brush with melted butter now if using powdered sugar glazes—it helps the sweetness cling like morning dew on grass.
Creating a Delicious Glaze
Transform your treats from plain to showstopping with a glossy finish that adds both flavor and flair. A well-crafted glaze locks in moisture while creating visual appeal—think of it as edible jewelry for your creations. Let’s explore how to craft this sweet crown and make every bite memorable.
Mixing Powdered Sugar, Milk, and Vanilla Extract
Start with 1 cup powdered sugar sifted to remove lumps. Gradually whisk in 2-3 tablespoons of milk and 1 tsp vanilla extract until silky. As one pastry chef recommends:
“Sift twice—once before measuring and once after. It’s the secret to mirror-smooth results!”
Adjust thickness by adding milk drop by drop or extra sugar. The ideal consistency coats the back of a spoon but still drips slowly. For warm spice notes, swap vanilla for almond extract or add a pinch of nutmeg.
Customizing the Glaze with Food Coloring and Toppings
Divide the glaze into small bowls for color variations. Use gel food coloring for vibrant hues without thinning the mixture. Dip treats while they’re slightly warm (after 5 minutes on a wire rack)—this helps the coating cling like morning dew.
Creative topping ideas:
- Crushed pistachios pressed into glaze with a nut pan
- Edible glitter or rainbow sprinkles for festive flair
- Citrus zest mixed into the glaze for tangy contrast
Let the glaze set completely before stacking—about 15 minutes. This prevents stickiness while maintaining that crisp, sugary shell. Now you’re ready to make these treats the star of any brunch spread!
Baked Donuts: Healthier Toppings and Flavor Variations
The finishing touch transforms simple treats into edible masterpieces. Creative coatings and mix-ins let you balance indulgence with smart choices while adding visual excitement. From nostalgic classics to bold new combos, these ideas cater to every craving.
Classic Cinnamon Sugar Coating
Combine ½ cup granulated sugar with 1 tsp cinnamon for that iconic sweet-spicy crunch. For adventurous palates, mix in cardamom or pumpkin pie spice. A professional baker shares:
“Roll warm treats in the mixture immediately after baking—the residual heat helps the coating cling like glitter!”
Balance flavors by adjusting spice ratios. Too much cinnamon overwhelms delicate textures, while too little leaves them bland. Pair this topping with vanilla glaze for layered sweetness.
Innovative Add-Ins like Chocolate Chips and Nuts
Fold ¼ cup mini chocolate chips into batter before baking for melty surprises. Toasted pecans or almonds add satisfying crunch without excess sugar. When using mix-ins:
- Chop nuts finely to prevent batter separation
- Dust chocolate chips with dry ingredients to prevent sinking
- Bake at oven 350°F as directed—higher temps burn add-ons
For holiday flair, try crushed candy canes or orange zest. Birthday sprinkles work for festive occasions, while coconut flakes offer tropical vibes. The key? Let toppings complement—not dominate—the tender base.
Tips and Expert Tricks for Success
Mastering these techniques ensures your treats stay tender and delicious every time. Focus on gentle handling and precise adjustments to avoid common pitfalls.
Preventing Overmixing and Ensuring a Light Texture
Mix wet ingredients and dry components just until combined—about 30 seconds. Overworked batter activates too much gluten, leading to dense results. As one baker warns:
“Stop stirring when you see a few flour streaks. Residual mixing happens as you pipe!”
Use a spatula instead of a whisk for folding. Check consistency: It should slowly slide off the spoon but hold its shape briefly.
Adjusting Consistency: Milk and Powdered Sugar Balancing
If batter feels thick, add milk 1 tsp at a time. For glazes needing thickness, sift powdered sugar twice before mixing. Troubleshooting tips:
- Uneven rise? Check baking soda expiration dates
- Tough texture? Reduce mixing time by 10 seconds
- Crumbly edges? Add ½ tbsp milk to the next batch
Proper ratios create airy treats with bakery-quality lift. Measure precisely, and you’ll nail the perfect bite every time.
Storing and Serving Your Donuts
Keep your homemade creations fresh and flavorful with smart storage solutions. Proper techniques preserve that just-baked texture while extending enjoyment beyond day one. Let’s explore how to maintain quality from pantry to plate.
Best Practices for Maintaining Freshness
Use an airtight container lined with parchment paper. This prevents sticking while blocking humidity. For glazed versions, separate layers with wax paper to avoid smudging designs. A pastry chef recommends:
“Room temperature storage works best—refrigeration dries out the crumb faster than sunlight melts butter!”
If using nuts or sprinkles, add them before serving. This keeps toppings crisp and prevents sogginess. Consume within 48 hours for peak freshness.
Make-Ahead Options and Freezing Guidelines
Freeze unglazed treats for up to 3 months. Wrap individually in plastic, then place in freezer bags. Thaw overnight at room temperature before adding toppings. For quick reheating:
- Microwave 5-7 seconds to restore softness
- Oven-warm at 300°F for 3 minutes to crisp edges
- Add 1 teaspoon milk when reheating cake-like varieties
| Storage Method | Duration | Texture Preservation |
|---|---|---|
| Airtight Container | 2 days | Soft interior, slight crust |
| Freezer | 3 months | Near-fresh when thawed |
Pair with fresh berries for brunch or dunk in coffee for afternoon breaks. The right storage strategy lets you savor every bite like it’s straight from the oven!
Conclusion
Ready to revolutionize your breakfast routine? These oven-made treats prove indulgence and wellness can coexist. By swapping frying for baking, you slash oil content while keeping that irresistible fluffiness. Remember: precise measurements (think tablespoons of milk) and timing (mins matter!) make all the difference.
First-timers succeed by following three tips: avoid overmixing, preheat thoroughly, and test doneness early. Experiment with flavor twists like pumpkin spice blends or doubling the vanilla extract for aromatic depth. Even small tweaks create entirely new experiences.